InDesign makes it easy to add hyperlinks and bookmarks to make your document interactive. However, keep in mind that the interactivity you add will not be evident in the InDesign workspace but will be seen in the exported PDF. We will discuss a few interactive elements in this chapter. It makes sense to set the workspace from Advanced to Interactive for PDF to enable easy access to interactive panels.
Adding URL Hyperlinks
It is very easy to add URL hyperlinks to any object in InDesign. You can add hyperlinks to an object so that clicking the object in the PDF will take the user to the website or you can add hyperlinks to text to get the same result.
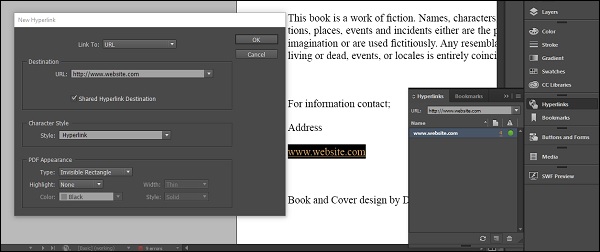
In the following example, we have selected the text to point to a hyperlink. Go to the Hyperlink panel and click the Create new hyperlink at the bottom of the panel to open the New Hyperlink dialog box.

Make sure the Link To field is set to URL. Type the URL in the URL field and click OK. InDesign now creates the URL for the text selected. Whenever you export this as a PDF and click the text, it will open the URL in your default web browser.
Hyperlinking a Page
Similar to hyperlinking a URL, it is also possible to hyperlink an object or text to a specific page in the document. Clicking the text or object will take the user to the linked page.
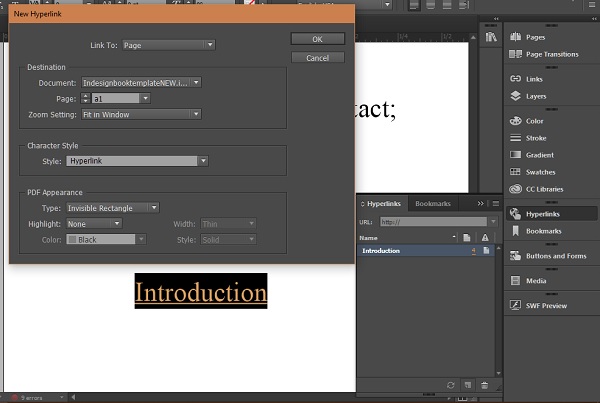
In the following example, let us consider a text called Introduction, clicking which we want the user to go to Chapter 1. Select the text and click the Create new hyperlink at the bottom of the panel to open the New Hyperlink dialog box.
This time, instead of the URL, select Page in the Link To dropdown menu. We know Chapter 1 of this book starts from page a1, so in the Page dropdown menu, select a1. We want the contents of the chapter to zoom to fit inside window, so we will select Fit in Window in the Zoom Setting. Click OK to add the hyperlink to the document.
Now, whenever this is exported as a PDF, any user who clicks on the Introduction text will go directly to Chapter 1.

Adding Bookmarks
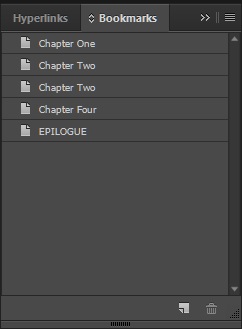
Bookmarks are also hyperlinks which make it easier for the user to navigate the document. You can create a bookmark for every page or simply create a ToC to insert bookmarks. Bookmarks are automatically created when you insert a ToC.

In this example, we have already created the ToC from the earlier chapter. You can access the bookmarks from the Bookmarks panel present in the same Hyperlinks panel.
Exporting Interactive Documents
As discussed in the beginning of this chapter, you cannot view the interactivity within the actual InDesign workspace. You have to export it as a PDF. There are several options available when you export it as a PDF.
To export a document as a PDF, go to the File menu, then click on Export… If you notice, among the various export formats available, there are two Adobe PDF export options – one is the Adobe PDF (Interactive) and the other is Adobe PDF (Print).
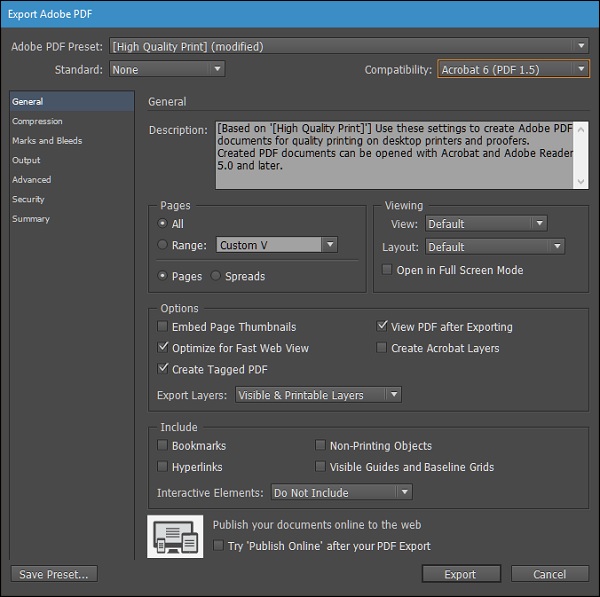
For all intents and purposes, you need to select the Adobe PDF (Print) unless you have multimedia content such as movies or audio in the document. Click Save. This will open the Export Adobe PDF dialog box.

There are a lot of settings to get the exact PDF output you want but just make sure to set the Compatibility to Acrobat 6 (PDF 1.5) or higher.
In the Include section, make sure Bookmarks and Hyperlinks checkboxes are turned on. You can also turn on the View PDF after Exporting in the Optionssection to open the PDF in your PDF viewer after export.
No comments:
Post a Comment