Wednesday, August 29, 2018

AJAX - Browser Support

All the available browsers cannot support AJAX. Here is a list of major browsers that support AJAX.
  • Mozilla Firefox 1.0 and above.
  • Netscape version 7.1 and above.
  • Apple Safari 1.2 and above.
  • Microsoft Internet Explorer 5 and above.
  • Konqueror.
  • Opera 7.6 and above.
When you write your next application, do consider the browsers that do not support AJAX.
NOTE − When we say that a browser does not support AJAX, it simply means that the browser does not support the creation of Javascript object – XMLHttpRequest object.

Writing Browser Specific Code

The simplest way to make your source code compatible with a browser is to use try...catch blocks in your JavaScript.
<html>
   <body>
      <script language = "javascript" type = "text/javascript">
         <!-- 
         //Browser Support Code
         function ajaxFunction() {
            var ajaxRequest;  // The variable that makes Ajax possible!

            try {
               // Opera 8.0+, Firefox, Safari 
               ajaxRequest = new XMLHttpRequest();
            } catch (e) {

               // Internet Explorer Browsers
               try {
                  ajaxRequest = new ActiveXObject("Msxml2.XMLHTTP");
               } catch (e) {
                  
                  try {
                     ajaxRequest = new ActiveXObject("Microsoft.XMLHTTP");
                  } catch (e) {

                     // Something went wrong
                     alert("Your browser broke!");
                     return false;
                  }
               }
            }
         }
         //-->
      </script>
      
      <form name = 'myForm'>
         Name: <input type = 'text' name = 'username' /> <br />
         Time: <input type = 'text' name = 'time' />
      </form>
      
   </body>
</html>
In the above JavaScript code, we try three times to make our XMLHttpRequest object. Our first attempt −
  • ajaxRequest = new XMLHttpRequest();
It is for Opera 8.0+, Firefox, and Safari browsers. If it fails, we try two more times to make the correct object for an Internet Explorer browser with −
  • ajaxRequest = new ActiveXObject("Msxml2.XMLHTTP");
  • ajaxRequest = new ActiveXObject("Microsoft.XMLHTTP");
If it doesn't work, then we can use a very outdated browser that doesn't support XMLHttpRequest, which also means it doesn't support AJAX.
Most likely though, our variable ajaxRequest will now be set to whatever XMLHttpRequest standard the browser uses and we can start sending data to the server. The step-wise AJAX workflow is explained in the next chapter.

AJAX - Examples

Here is a list of some famous web applications that make use of AJAX.

Google Maps

A user can drag an entire map by using the mouse, rather than clicking on a button.

Google Suggest

As you type, Google offers suggestions. Use the arrow keys to navigate the results.

Gmail

Gmail is a webmail built on the idea that emails can be more intuitive, efficient, and useful.

Yahoo Maps (new)

Now it's even easier and more fun to get where you're going!

Difference between AJAX and Conventional CGI Program

Try these two examples one by one and you will feel the difference. While trying AJAX example, there is no discontinuity and you get the response very quickly, but when you try the standard GCI example, you would have to wait for the response and your page also gets refreshed.

AJAX Example

 *  =  

Standard Example

 *  =  
NOTE − We have given a more complex example in AJAX Database.

AJAX - Technologies

AJAX cannot work independently. It is used in combination with other technologies to create interactive webpages.

JavaScript

  • Loosely typed scripting language.
  • JavaScript function is called when an event occurs in a page.
  • Glue for the whole AJAX operation.

DOM

  • API for accessing and manipulating structured documents.
  • Represents the structure of XML and HTML documents.

CSS

  • Allows for a clear separation of the presentation style from the content and may be changed programmatically by JavaScript

XMLHttpRequest

  • JavaScript object that performs asynchronous interaction with the server.

What is AJAX?

AJAX stands for Asynchronous JavaScript and XML. AJAX is a new technique for creating better, faster, and more interactive web applications with the help of XML, HTML, CSS, and Java Script.
  • Ajax uses XHTML for content, CSS for presentation, along with Document Object Model and JavaScript for dynamic content display.
  • Conventional web applications transmit information to and from the sever using synchronous requests. It means you fill out a form, hit submit, and get directed to a new page with new information from the server.
  • With AJAX, when you hit submit, JavaScript will make a request to the server, interpret the results, and update the current screen. In the purest sense, the user would never know that anything was even transmitted to the server.
  • XML is commonly used as the format for receiving server data, although any format, including plain text, can be used.
  • AJAX is a web browser technology independent of web server software.
  • A user can continue to use the application while the client program requests information from the server in the background.
  • Intuitive and natural user interaction. Clicking is not required, mouse movement is a sufficient event trigger.
  • Data-driven as opposed to page-driven.

Rich Internet Application Technology

AJAX is the most viable Rich Internet Application (RIA) technology so far. It is getting tremendous industry momentum and several tool kit and frameworks are emerging. But at the same time, AJAX has browser incompatibility and it is supported by JavaScript, which is hard to maintain and debug.

AJAX is Based on Open Standards

AJAX is based on the following open standards −
  • Browser-based presentation using HTML and Cascading Style Sheets (CSS).
  • Data is stored in XML format and fetched from the server.
  • Behind-the-scenes data fetches using XMLHttpRequest objects in the browser.
  • JavaScript to make everything happen.

Thursday, August 23, 2018

Firebase - Deploying

In this chapter, we will show you how to host your app on the Firebase server.
Before we begin, let us just add some text to index.html body tag. In this example, we will add the following text.
<h1>WELCOME TO FIREBASE TUTORIALS APP</h1>

Step 1 - Install Firebase Tools

We need to install firebase tools globally in the command prompt window.
npm install -g firebase-tools

Step 2 - Initialize the Firebase App

First we need to login to Firebase in the command prompt.
firebase login
Open the root folder of your app in the command prompt and run the following command.
firebase init
This command will initialize your app.
NOTE − If you have used a default configuration, the public folder will be created and the index.html inside this folder will be the starting point of your app. You can copy your app file inside the public folder as a workaround.

Step 3 - Deploy Firebase App

This is the last step in this chapter. Run the following command from the command prompt to deploy your app.
firebase deploy
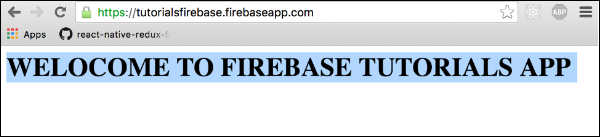
After this step, the console will log your apps Firebase URL. In our case, it is called https://tutorialsfirebase.firebaseapp.com. We can run this link in the browser to see our app.
Firebase Deploying

Firebase - Security

Security in Firebase is handled by setting the JSON like object inside the security rules. Security rules can be found when we click on Database inside the side menu and then RULES in tab bar.
In this chapter, we will go through a couple of simple examples to show you how to secure the Firebase data.

Read and Write

The following code snippet defined inside the Firebase security rules will allow writing access to /users/'$uid'/ for the authenticated user with the same uid, but everyone could read it.

Example

Let us consider the following example.
{
   "rules": {
      "users": {
         
         "$uid": {
            ".write": "$uid === auth.uid",
            ".read": true
         }
         
      }
   }
}

Validate

We can enforce data to string by using the following example.

Example

{
   "rules": {
      
      "foo": {
         ".validate": "newData.isString()"
      }
      
   }
}
This chapter only grabbed the surface of Firebase security rules. The important thing is to understand how these rules work, so you can combine it inside the app.

Firebase - Offline Capabilities

In this chapter, we will show you how to handle the Firebase connection state.

Check Connection

We can check for connection value using the following code.

index.js

var connectedRef = firebase.database().ref(".info/connected");

connectedRef.on("value", function(snap) {
   if (snap.val() === true) {
      alert("connected");
   } else {
      alert("not connected");
   }
});
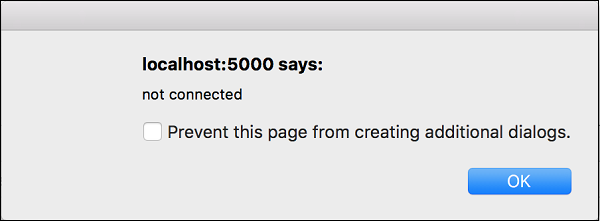
When we run the app, the pop up will inform us about the connection.
Firebase Offline Popup
By using the above given function, you can keep a track of the connection state and update your app accordingly.

AJAX - Quick Guide